Showing: 1 - 5 of 5 RESULTS

Help! My Quilt needs a Rod Pocket

Rod Pocket or Hanging Sleeve. Same thing, two different names.

They are the thing at the back top of the quilt that allows you to hang up your quilt on a rod. Most quilt shows require that your quilts have a rod pocket of about 3″ so that they can hang your quilt on the stand crossbars.

4″ is a standard Rod Pocket size. This means it should be 4″ high, and it should go across the width of the quilt.
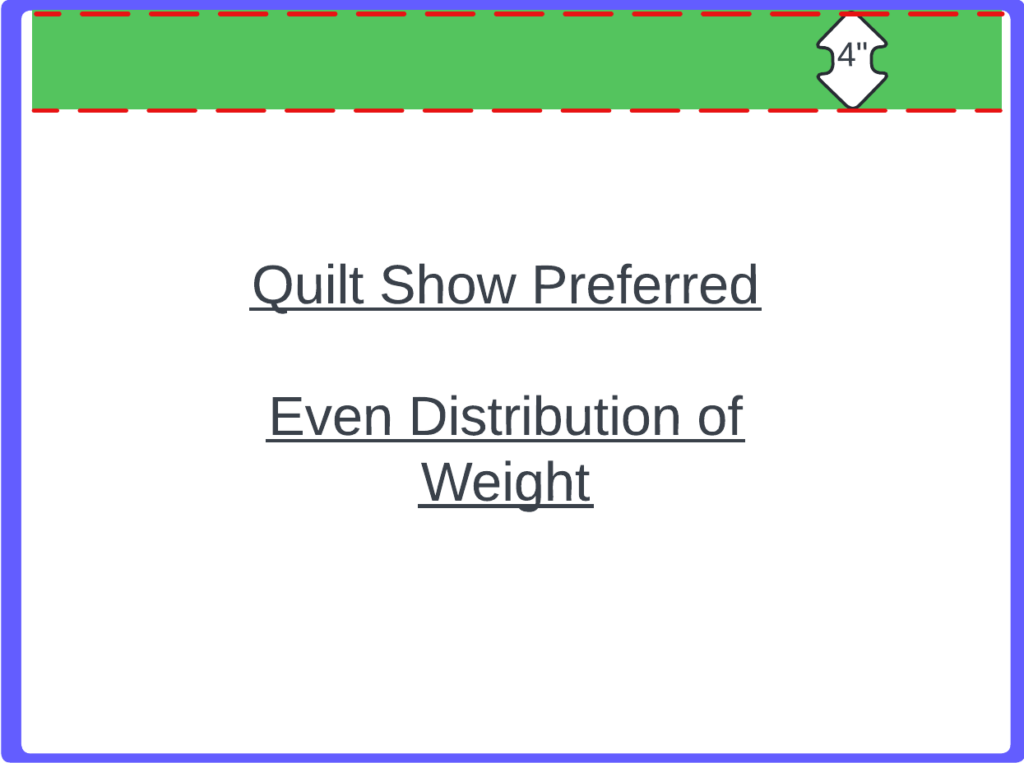
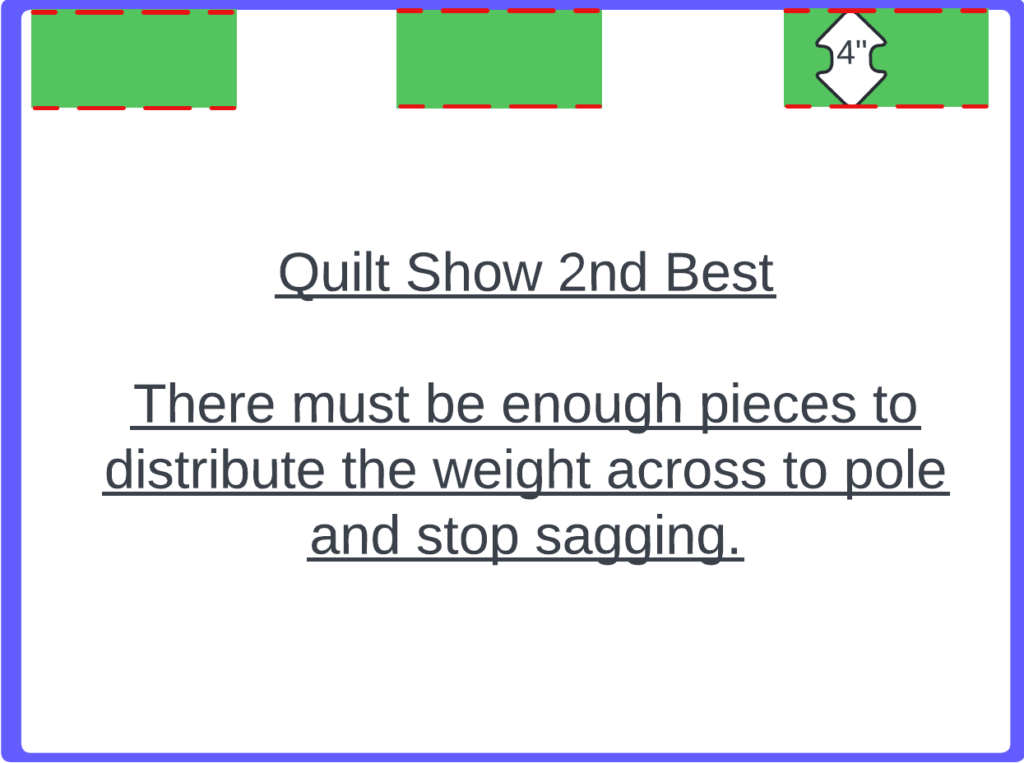
Single vs Double Layer

Some people do their rod pockets as a tube and then put the tube on the back. This protects the back of the quilt from the wooden / metal rod. If you have loose stitching, a pale colour back or a large (say Queen size or bigger) quilt then this is the best option.

If you have a smaller quilt and it’s just a temporary rod pocket for the show, you can get away with just a single piece of fabric with the sides ironed in as little hems.

No Pins!

Most groups specify no pins. That means no pins. No straight sewing pins. No safety pins. You sew your rod pocket on. Even big basting stitches are better than safety pins. No one wants to give your quilt back to you with torn backing because the safety pins couldn’t handle the weight of the quilt. No one hanging your quilt wants the safety pin to come open and jab them.

When they say no pins, they mean no pins.

Permanent vs Temporary

If you have a large quilt that will be hung in your local show and then spend the rest of its life on the bed, then a quick and dirty temporary pocket is fine. This should be sewn on after the binding is on the quilt and you can remove it afterwards and use it on another quilt.

If you are going to hang the quilt again in the future then go to a bit more effort. Plan ahead and make the rod pocket out of the same fabric as the backing so it isn’t obvious. Pin the top of the rod pocket on the back before you sew your binding. Then when you sew your binding the top of the rod pocket is sewn on at the same time.

Leaving Some Space

You need to allow some “give” in the rod pocket so that there is room for the pole to go in, otherwise the quilt will wrap around the pole and you will see a bulge along the top of the quilt. If you are doing a tube, then you will need to make one side a little larger than the others.

If I’m doing just a temporary single strip of material, I slip my hand flat in the rod pocket to give it a bit of height and pin it down with my hand in there. Very high tech.

Putting it all together

I love this video – she shows how you can make a tube including the give for the pole and shows sewing it on either before or after adding the binding. I don’t bother sewing the hem on the ends of the tube – I just fold ’em under and press them.

Blind Hem Instead

Not into the hand sewing of the top/bottom of the quilt? If you know how to Blind Hem then stitch them using a Blind Hem foot. Fold your quilt back so the little mountains of the blind hem stitch go on the quilt, and the straight bit of the blind stitch goes on the rod pocket. This can be done on either the top or bottom of the rod pocket. I’ve never done this myself – I have a blind hem foot and will have to learn how to use it one day!

Alternatives

If hanging a quilt at home, you can think about putting on triangle corners on the back of your quilt, then the holding rail goes into these corners and the holding rail is held up in the center. Bit like hanging clothes on a clothes hanger.
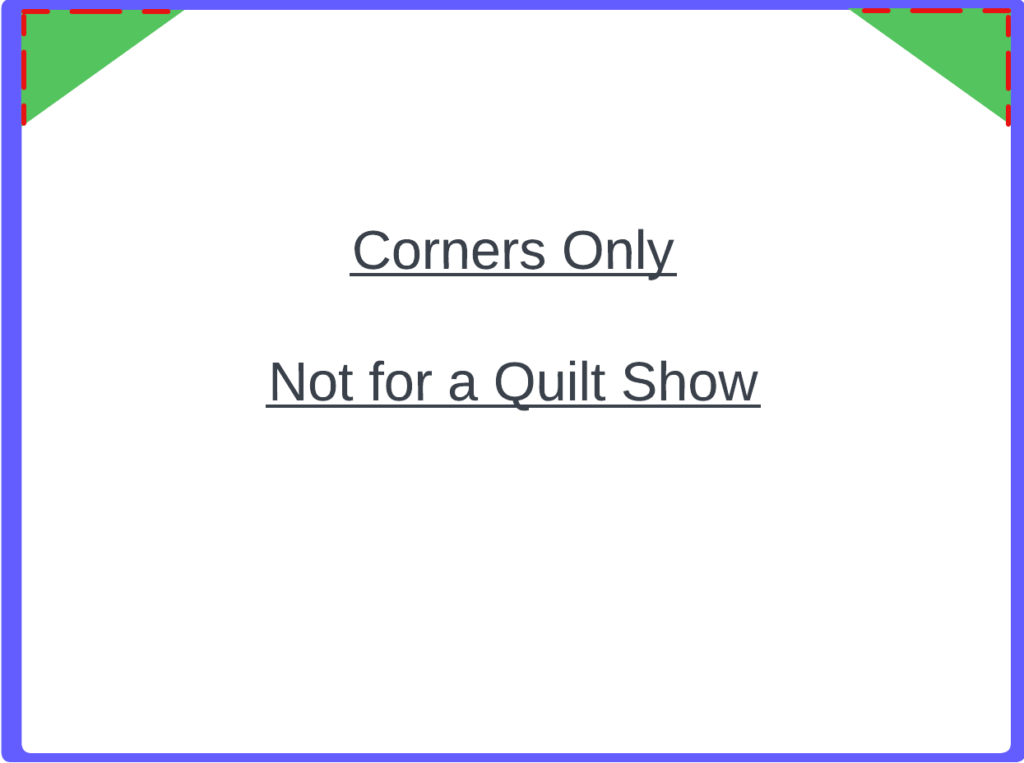
Two issues with this method:

  1. It will not work at a quilt show as the rods need to stick out on either side of your quilt.
  2. You have to get your hanging rod exactly the right length. Too short and the quilt will sag or the hanging rod will fall out. Too long and you will stretch the fabric and put the stitching under tension.

I prefer the rod pocket myself.

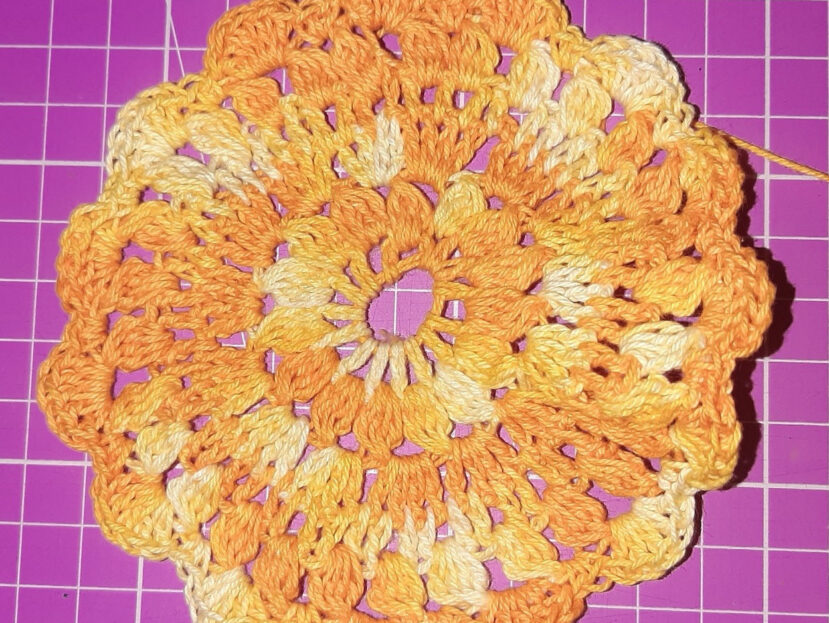
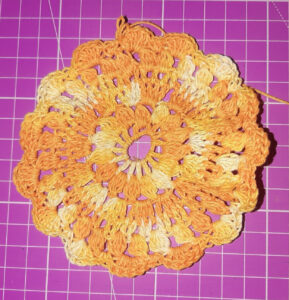
Completed Coaster

Crotchet Coaster

Crochet thread scraps. Anyone who does crochet tea towels has scraps left over. Not enough for another tea towel, too much to throw away. Inspired by crochet coasters made by my friend Donna, I started using up my scraps on coasters. Very rarely do I get more than two the same.

These instructions are written in the terminology I use – Australia / New Zealand / UK terminology. If you are used to using the US terminology, see the US version of these instructions – to come very soon. (ie UK double crochet = US single crochet, etc.)

Materials

Yarn: 4ply crochet cotton

Crochet Hook Size: 3.5 mm

Stitch Notes

ch- chain, sl st – slip stitch, dc – double crochet, tc – treble crochet

Magic ring: https://www.wikihow.com/Crochet-a-Magic-Ring

4 Treble Bobble Stitch: https://blog.treasurie.com/bobble-stitch/

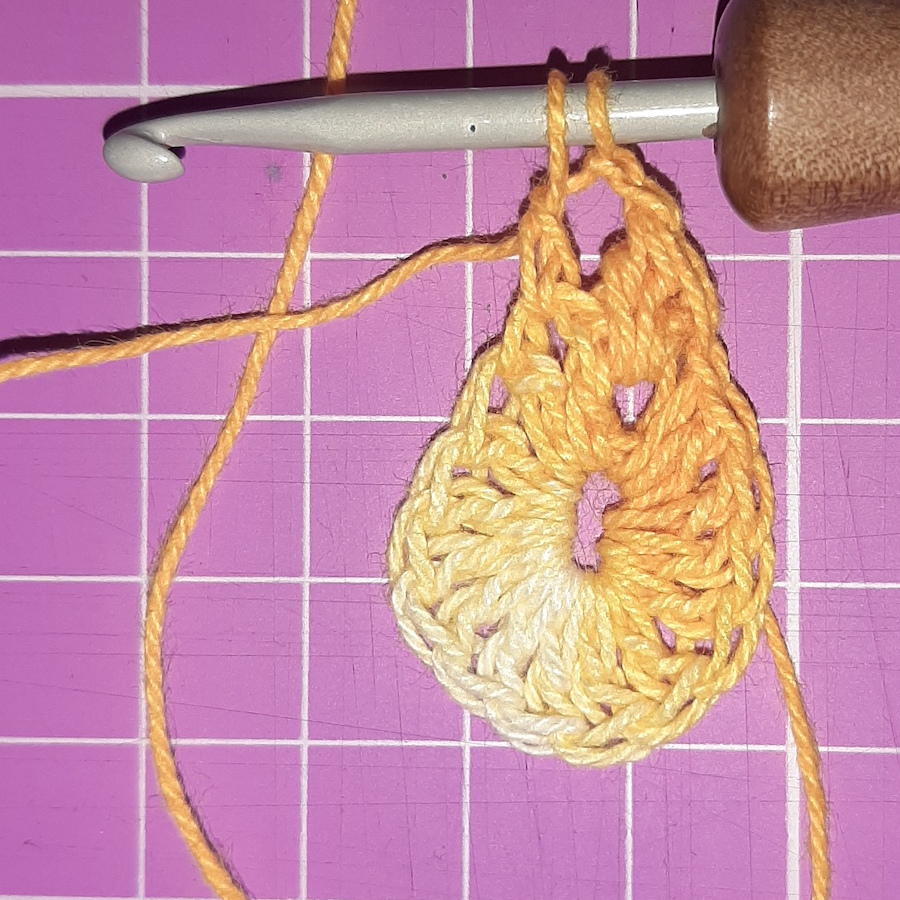
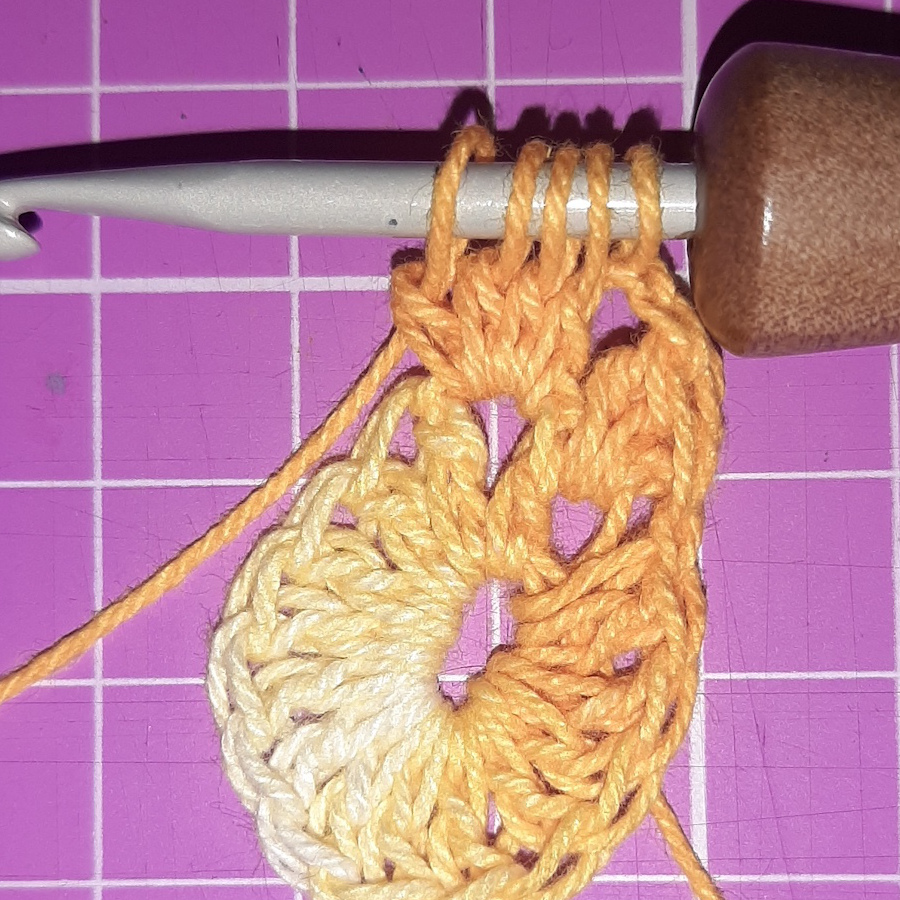
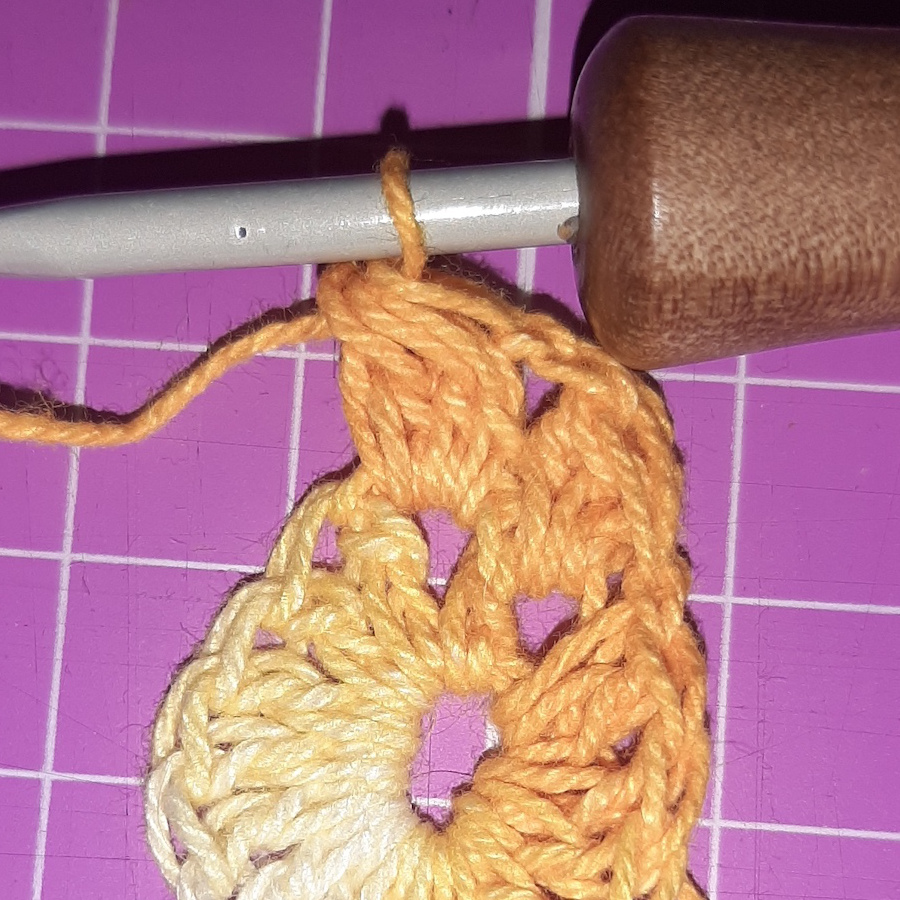
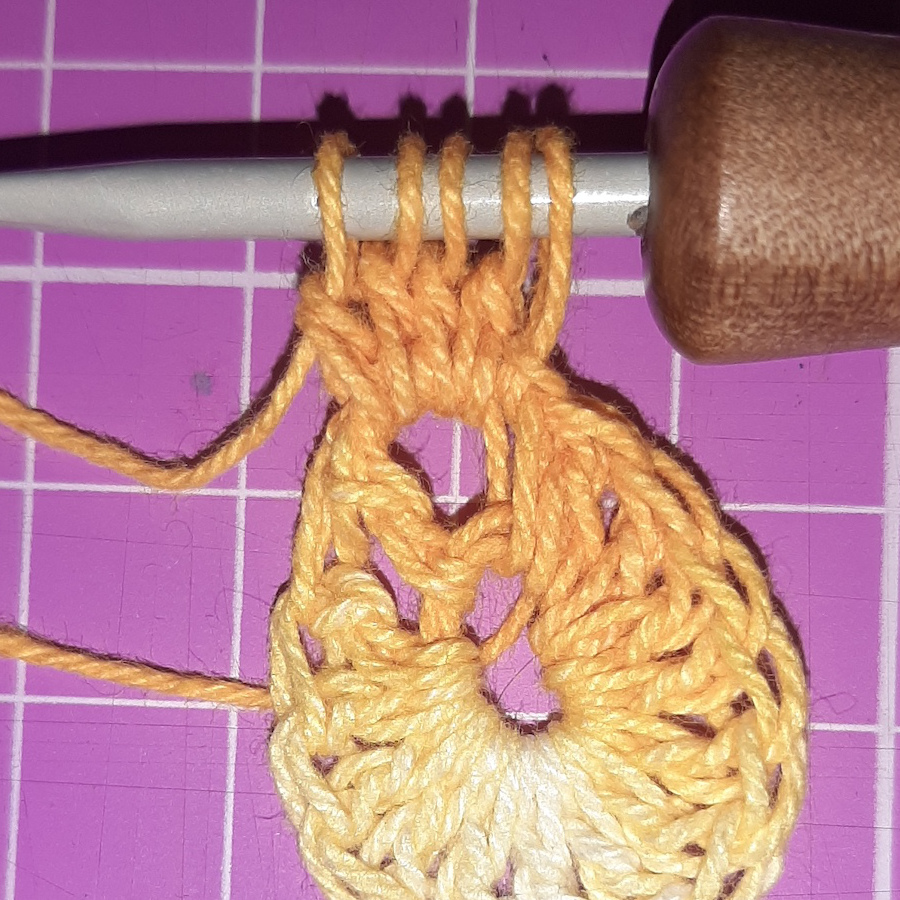
Do a half treble crochet – ie do a treble stitch except the final pull through the two loops. Do three more half treble crochet. You will end up with 5 loops (starting loop plus 4 loops from the trebles. Wrap the yarn around the hook and pull through all 5 loops.

Do a half treble crochet – do the stitch except the final pull through the final loops. Do three more half treble crochet. You will end up with 5 loops (starting loop plus 4 loops from the trebles. Wrap the yarn around the hook and pull through all 5 loops.

Instructions

Round 0: Make a single or double magic ring. I prefer double.


Round 1: chain 3, 14 tc into the circle, join with sl st to top of chain 3 (15 stitches)


Round 2: Pull out the loop to the height of a tc and do a bobble st (4 half trebles) in the same hole, * chain 2, bobble st in next tc **, repeat from * to ** 14 times to complete the round, join with sl st to top of the 1st bobble st (45 sts).


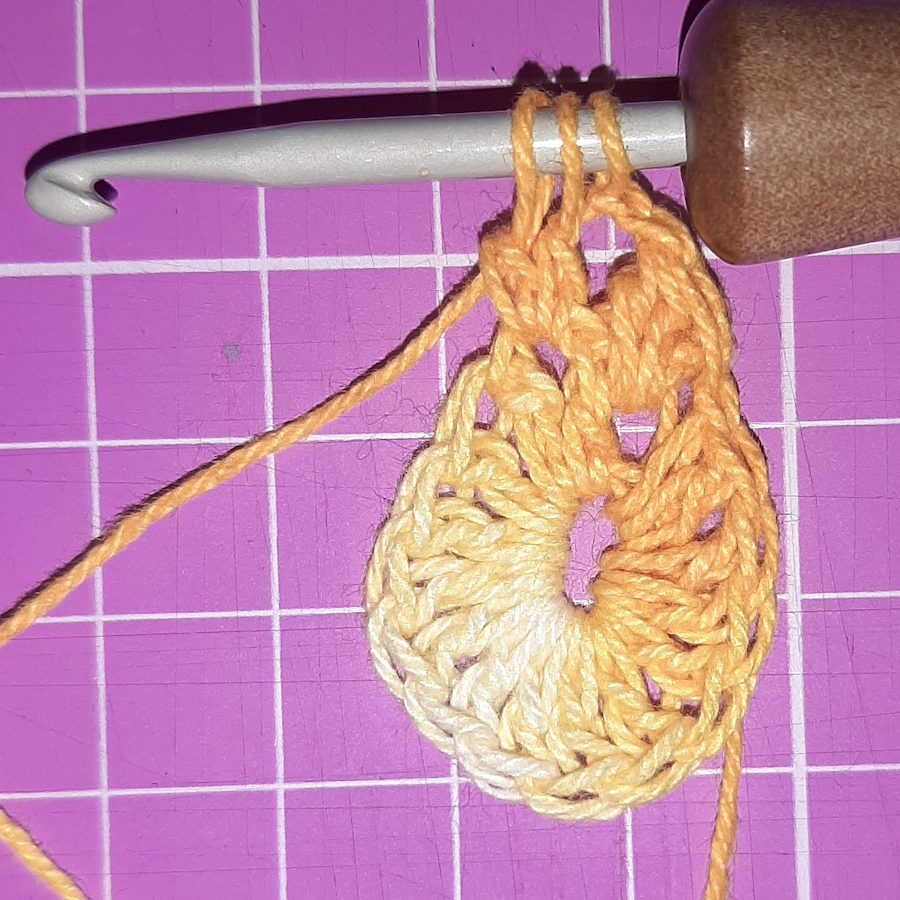
Round 3: sl st to next chain 2 space, chain 3, 3 tc in same space, * 4 tc in next chain space**,  repeat from * to ** 14 times to complete the round, join with sl st to top of chain 3. (60 sts).

I use slip stitches to get to the next chain space at the beginning of the round just so the start of the round is in a different spot, to hide any “start of row” oddities. It doesn’t affect the pattern if you don’t do the slip stitches. Also note there are no chain stitches in this row between the tc groups – it should be one solid round of trebles.


Round 4: Chain 2, then tc in each stitch around rest of round, join with sl st to top of chain stitches (60 st)


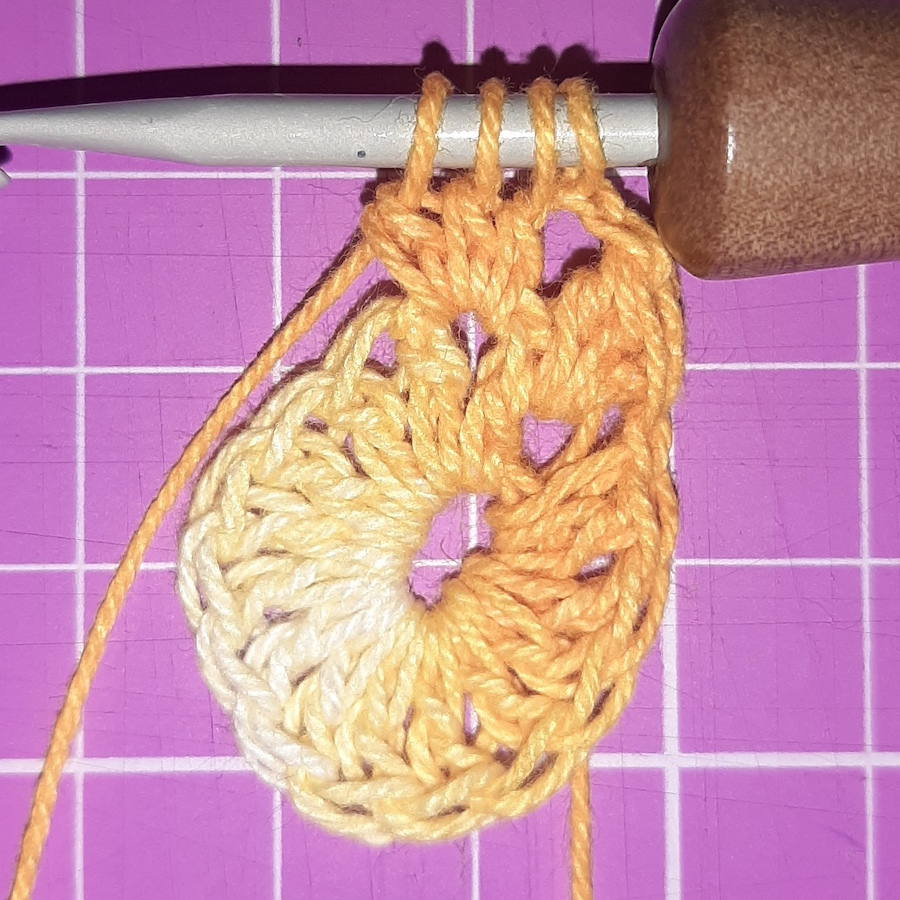
Round 5: sl st to between the previous row’s chain and first tc. (Again we are trying to move the start of the row to a different spot and this can be skipped if desired.)

Pull out the loop to the height of a tc and do a bobble st in same place, * chain 2, skip one tc, bobble st in next tc **, repeat from * to ** 29 times to complete the round, join with sl st to top of the 1st bobble st (30 bobble sts)


Round 6: sl st in next chain 2 space, do 1 chain and 1 dc in that space, 5 tc in next chain 2 space, * 2 dc in next chain 2 space, 5 tc in next chain 2 space **, rep from * to ** around, join with sl st to the 1st dc. If the counting has gone wrong and you end with the 2 dc’s that’s fine – it’s better to have the 2 x 2 dc parts next to each other than 2 of the 5 tc parts. It’s less obvious.

Completed Coaster

Finishing off: Break thread, feed loose thread through loop, tighten and sew in the ends as usual. Press with a steam iron to flatten. I prefer not to starch as I like them soft but starch if you like prefer the stiffened finish.

This pattern was inspired by the Crochet Coaster Free Pattern http://beautifulcrochetstuff.com/crochet-coaster-free-pattern/ from Beautiful Crochet and the coaster patterns from Henna’s Boutique.

What to Expect at a Quilt Show

Thinking of visiting a Quilt Show for the first time and wonder how it works? Let me guide you through a typical small to medium size quilt show run by a local Quilt group in Australia – at least, on the east coast of Australia. Maybe the folks from Perth could tell us if it works the same over there.

Parking

Check the location on Google Maps first. Most groups don’t have a lot of choice in the halls they can hire, so the parking ranges from very easy to woeful. Carpooling with your crafting friends makes parking easier and increases the fun of the visit.

Cash is Queen

Not everywhere accepts cards, and transferring money via direct debit has issues. So take along some ready cash (including your gold coins) and you will get in faster and be ready for all those little things you want to buy.

At the Door

Show entry, food tickets and raffle quilt tickets are being sold at the door.

Common door entry fee is about $5 at most smaller shows. All adults have to pay but mostly little kids will get waved through for free.

Morning/Afternoon Tea and Lunch vouchers are usually here too. To save the kitchen staff having to handle the money you pay for a voucher at the door, and hand in the voucher at the kitchen. Get one as you go in, or come back and get one later. It’s a great way to treat your friend – just buy them their voucher before they have a chance to argue.

See the gorgeous quilt or two behind the folks on the desk? They are the raffle quilts, to be drawn a week or so after the quilt show. Look for the volunteers with little raffle books in front of them and they will be happy to sell you a ticket or 3.

Viewers’ Choice

When you came in you were given a small slip of paper for viewers’ choice. Most smaller shows are not judged, so there are no 1st 2nd and 3rd rosettes being awarded. The visitors get to pick which is the “best” quilt in the show. Each quilt will have a number – write the number down on the slip and drop it in the box on the way out. The maker of the winning quilt will be given a small prize for their great work at the end of the show. It may not be an easy choice and no you can’t vote for more than one quilt. Only one.

Now you have paid and got your viewers’ choice slip, it’s on to the quilts.

Viewing the Quilts

The show floor will be a food-free zone, even if you see the volunteers with a cuppa and a scone. They can’t leave their post to get refreshments so the kitchen folk are running supplies to them at their posts. But apart from that no food or drink anywhere near the quilts *please*.

Walk up and down the aisles looking at the quilts. Make sure you take a step back for the larger quilts – looking too close you won’t see the overall effect of the design.

There will be people wearing white gloves wandering around near the quilts. These folks are the guardians of the quilts – if you want to see the back, or see something close up ask them and they will handle the quilt with their gloves. This keeps the natural hand oils off the fabric. If you have a question about a quilt they will be happy to chat and try to answer the question. They may even be able to point out the member who made the quilt!

Oh and don’t forget, the person who made the quilt might be standing nearby and hear your comments.

Challenges

Perhaps you espy a set of wallhangings, maybe with a rosette on one? That’s probably the challenge entry, which may be judged. The group members have been given a piece of fabric or a theme and challenged to make a wall hanging with the fabric, or on the theme. As they are small they will often be good examples of art style work with a lot of embellishment and layers, thread painting, etc. As a wall hanging we do not plan to wash them, so we can go to town on materials and techniques.

Retail Therapy

Around the quilts, or in a separate hall or room will be people with tables of goodies.

The Sales Table will have items made by members, such as tea towels, bags, cushion covers, beanies, cards, etc. Great for picking up a gift or treating yourself to something nice. Yes maybe you could make it yourself, but will you?

The Traders are local businesses that will be selling everything from fabric, quilting notions, sewing machines to goat’s milk and jams.

More Raffles

You don’t think they will stop at raffling just the quilts, do you? I told you to bring cash for a reason. There’s often a sewing basket raffle and a gourmet food hamper raffle for starters.

Then there is the shoebox raffle, also known as a penny raffle. You pay for a sheet of tickets and then you tear up the sheet into individual tickets. One ticket on the sheet you keep (they will tell you which one) and the rest you distribute how like into the shoeboxes next to the prizes you want to win. Put all your tickets in one box, or spread them out over a few boxes, however you like. They may be drawn at the end of the show, or at the end of the day and new prizes put out the next day.

Do I need to be present when the Raffles are drawn?

Generally no, that’s why you will be asked to put your name and phone number on everything. They will ring you if you are not present to arrange pick up/delivery. Or it may arrive via Friend Express if you are a friend of one of the members.

Cuppa Time!

After all that you will need to put your feet up and have a cuppa. Out the back or on the side usually will be some tables with some natty tablecloths and decorations. Using the vouchers you bought at the front door go to the window and collect a plate of nibbles and tea/coffee (morning or afternoon tea) or a plate of sandwiches and nibbles and tea/coffee (lunch). Sit down and have a chat with your friends, quietly look through your purchases or make a new friend.

And so farewell…

Quilts seen, raffles entered, money spent and sugar boosted, it’s time to leave this little patch of quilt heaven and enter the real world once more. Don’t forget to make sure you pop your viewers’ choice in the box and find out if the next show is planned for next year or two years’ time.

Looking for a quilt show to attend? Check my list of shows for South East Queensland.

Love Christmas

3D Card Fun

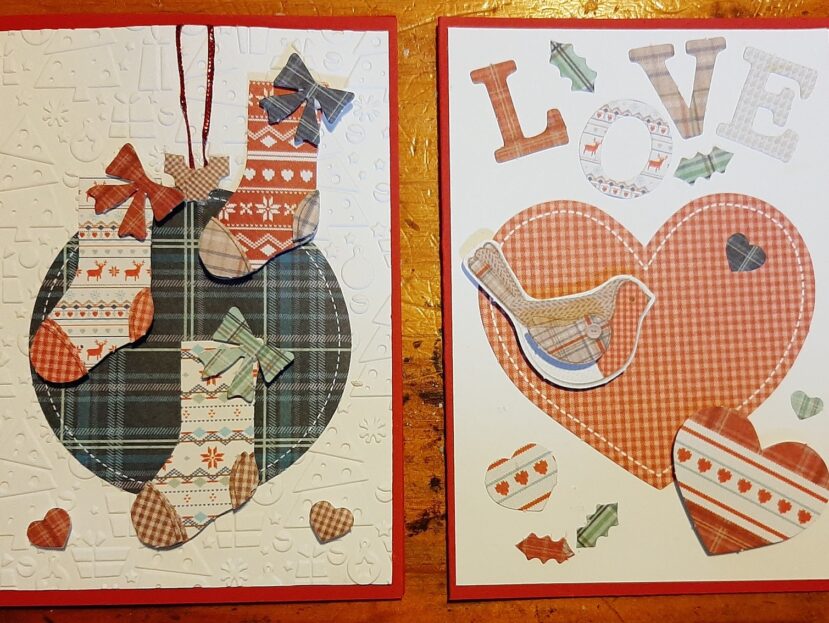
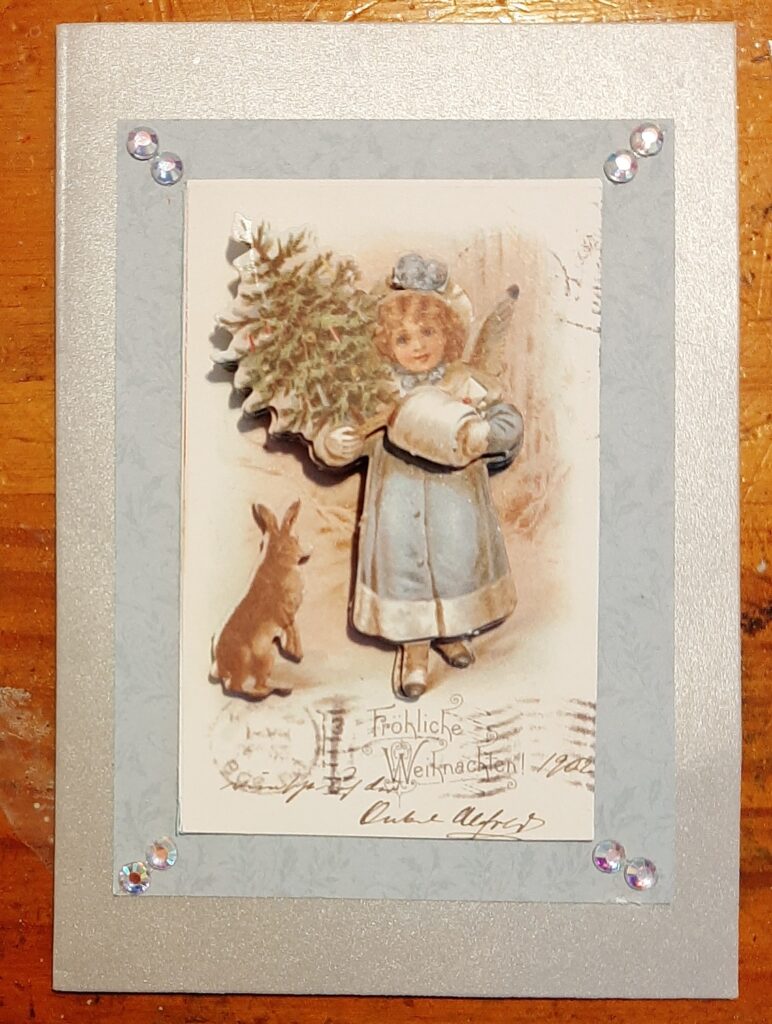
Christmas means Christmas cards. This year I decided to use up the Christmas card “kits” that I had in my stash, particularly the 3D decoupage page pages that had been sitting unloved for almost 10 years. Apart from one or two sticker sheets that I just can’t bear to part with, what doesn’t get used this Christmas is going to the local Kindergarten.

I had lots of fun making these cards but I made mistakes and had some challenges. Never be afraid of your mistakes – if you don’t like the way they look then take the card apart, salvage what you can, and start again. Even better still, jazz it up and call it a design feature.

How To….

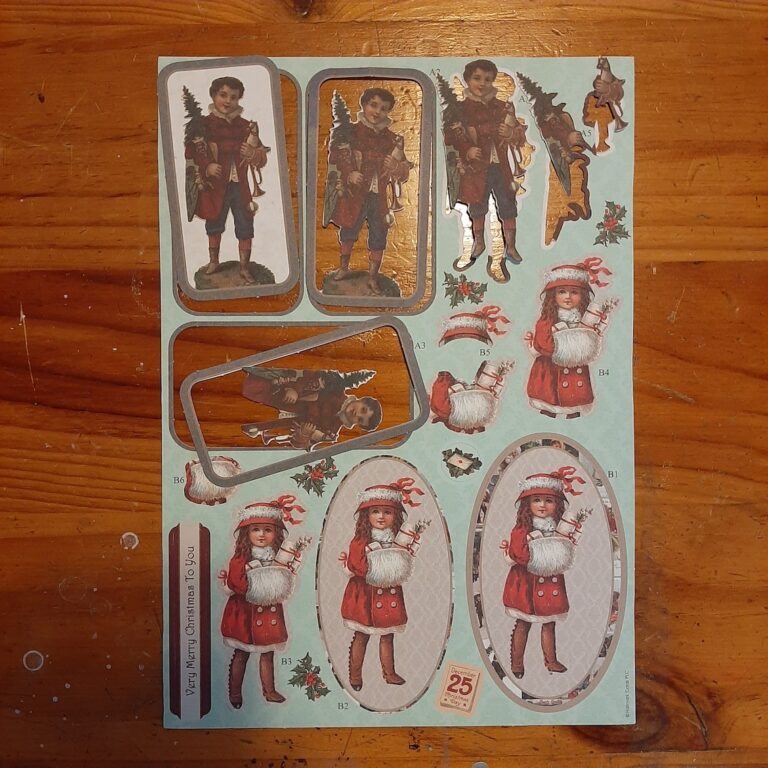
Firstly, what is card decoupage? Well, it’s not traditional decoupage – no picture mosaics or Mod Podge. Card decoupage is 3D card making where the picture is built up in layers so that the picture is in 3D, rather than making a popup cord. If you are searching online, search for “3D Decoupage”.

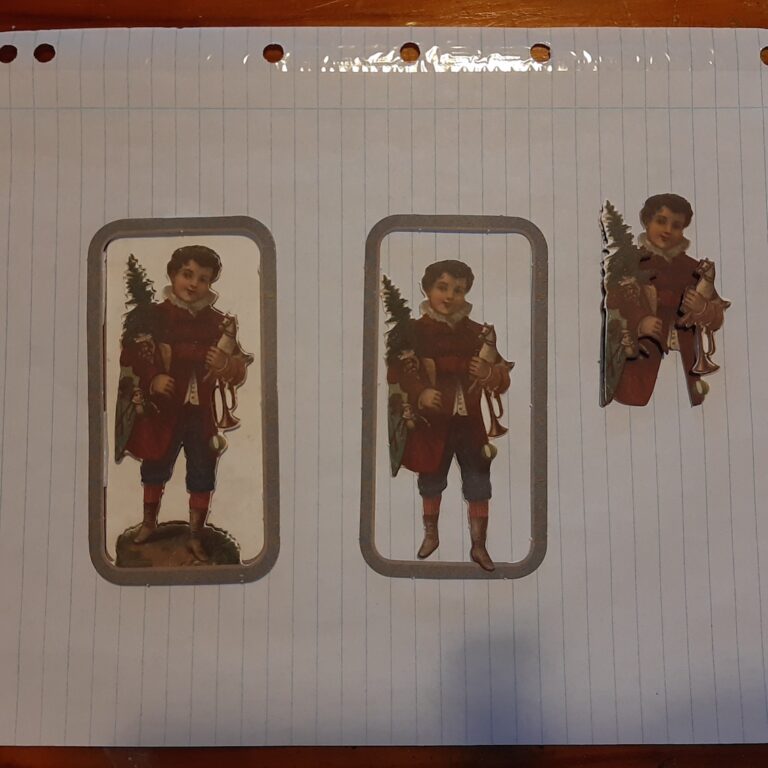
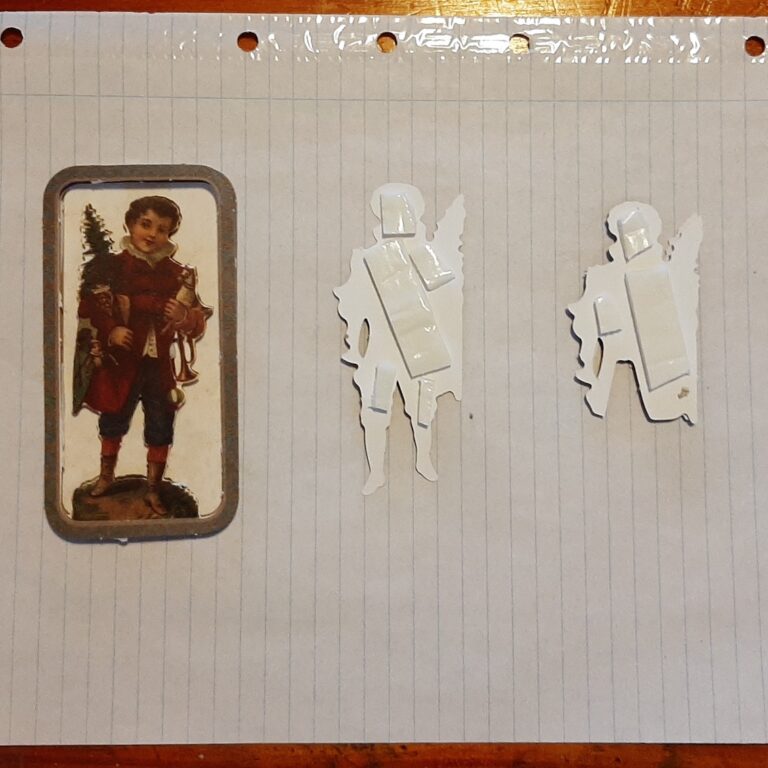
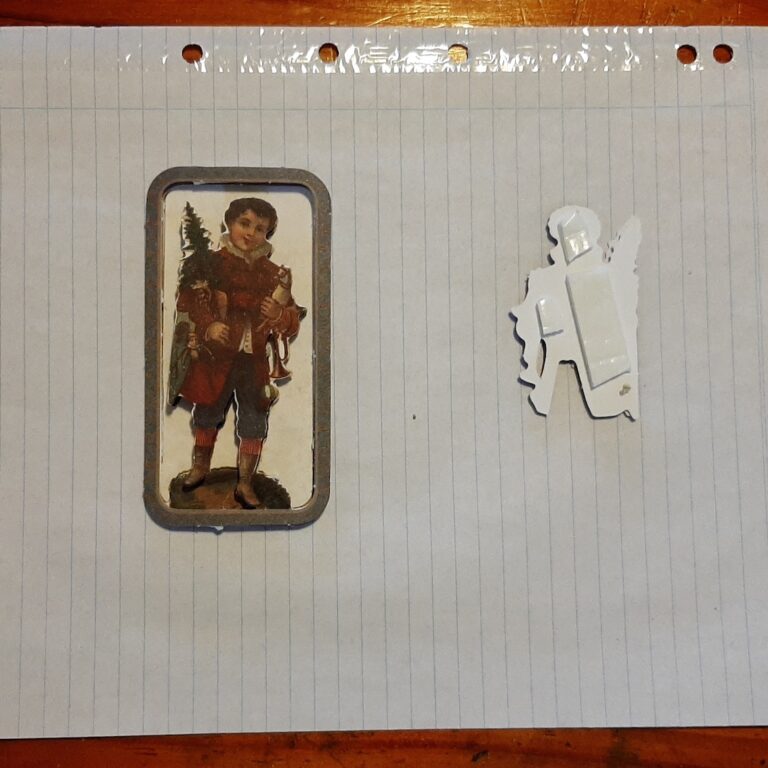
It comes on a sheet as shown below. Look for ones that are printed on light card stock and are marked as precut. Usually, there is a large background image and then a series of numbered layered images. Number 1 goes at the bottom. Pop out each piece in order and then layer the pieces using double-sided foam. I like to work from the bottom to the top but sometimes I will do a smaller side piece in a few layers and then add it to the main piece. Once I have all the layers, I then add the layers to the background image.

Then it is a matter of matting (if you think it needs it) and attaching it to the card front.

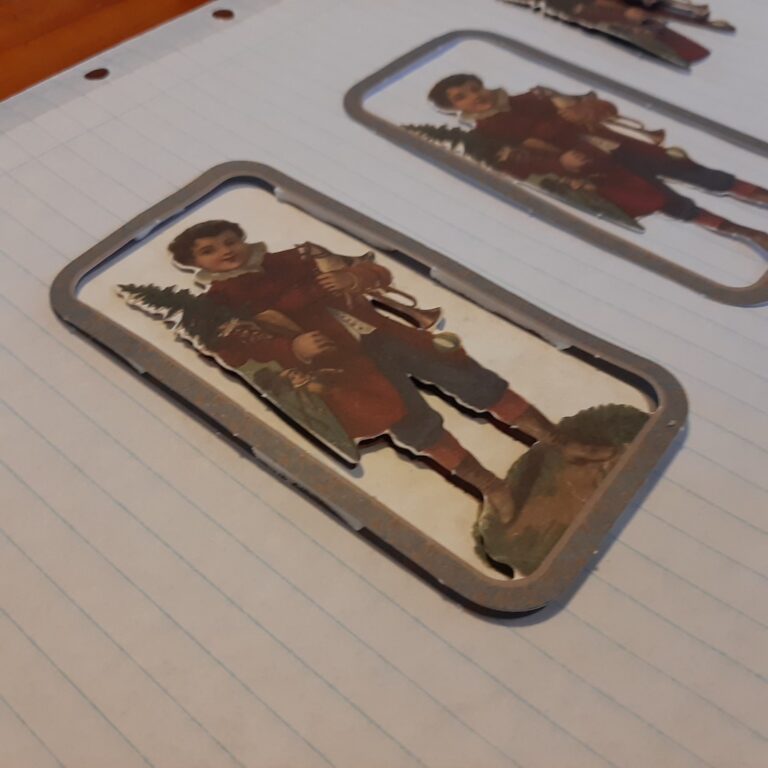
Normally I only pop out the pieces I am going to use straight away, so I don’t get confused, but I’ve popped out all the pieces in the photos to try to explain what I’m doing. The skinny frame was giving me problems as it was hot and muggy and the foam tape wanted to stick to everything, including the non-stick scissors, but not the cardstock. Next time it’s this hot, I will try sticking the foam tape in the fridge.

O Christmas Tree, O so Shiny Tree

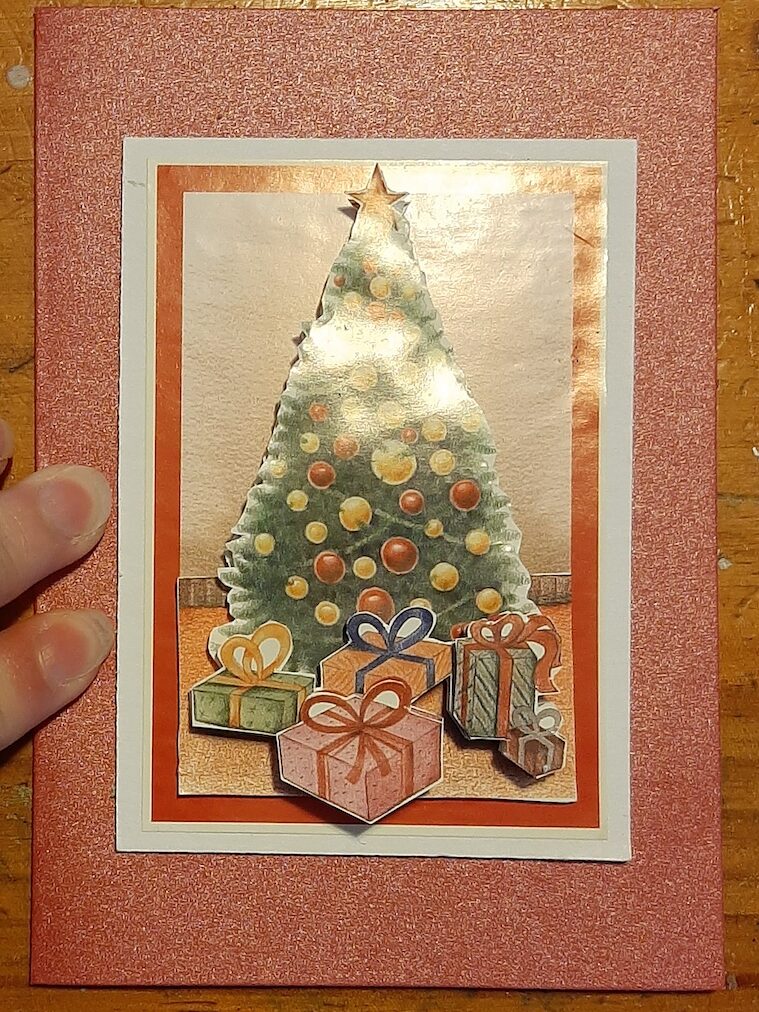
Christmas Tree Card FInished
High Gloss Christmas Tree

So, I had these trees in my stash that were printed in glossy thin paper. While the glossy look is really nice, the thin paper posed a few issues.

  • Fussy Cutting. Not my favourite pastime. The fix? Only buy pre-cuts in future.
  • Toooooo thin to be rigid. The top of the tree was on a definite lean even though it had sticky foam behind it. The fix? Glue the large tree to a scrap of cardstock and fussy cut (again) to give a rigid piece.
  • The background seemed very flat on the card due to the paper’s thinness. The fix? Use a thicker piece of card as the mat to give more dimension.
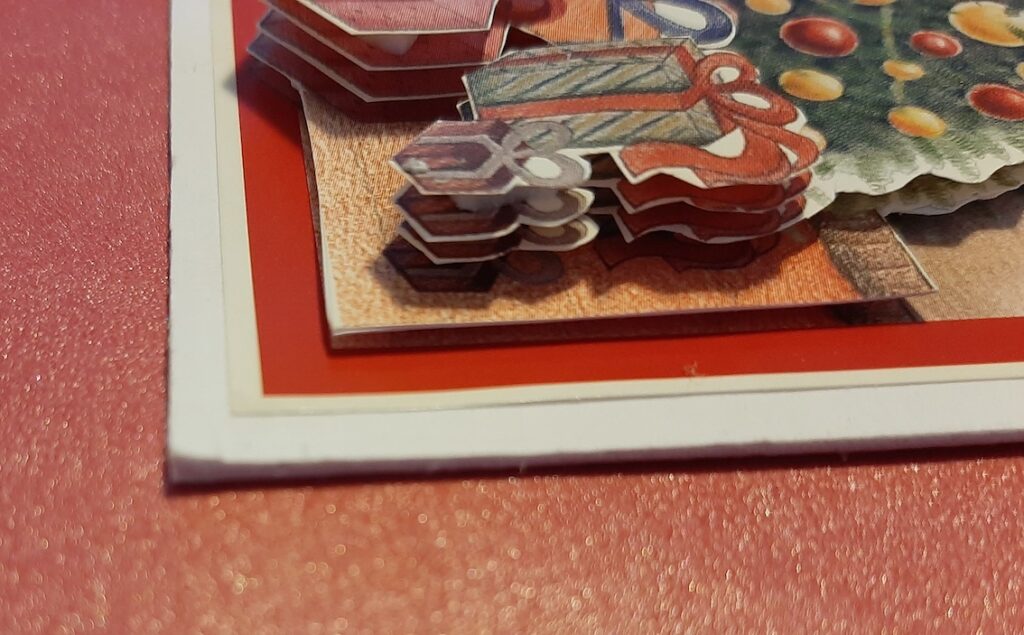
Side view of Christmas Tree
Side View – Thick card for the white mat, foam squares, and tape between layers.

Embellishment Redemption

Nuvo Drop Failure

Month ago I tried some Nuvo Glitter Drops that had been sitting in the stash for a few years in the corners of a mat. Hmm, I clearly need some more practice with the Drops as they went flat. So the card when into the naughty corner.

So what to do? Out came the tweezers and removed the decoupage from the blue mat. The tweezers are flat so they slide under the decoration and slice through the tape/glue without damaging the image.

Blue mat into bin. Look back into the pack and discover there is complementary blue paper in the pack. Win!

So, audition a few possibilities, re-mat, and re-fix to a card. This time some jewels will do for the corners. Saved!

Finished Card
No more naughty corner for this young lady!

Inside Matters

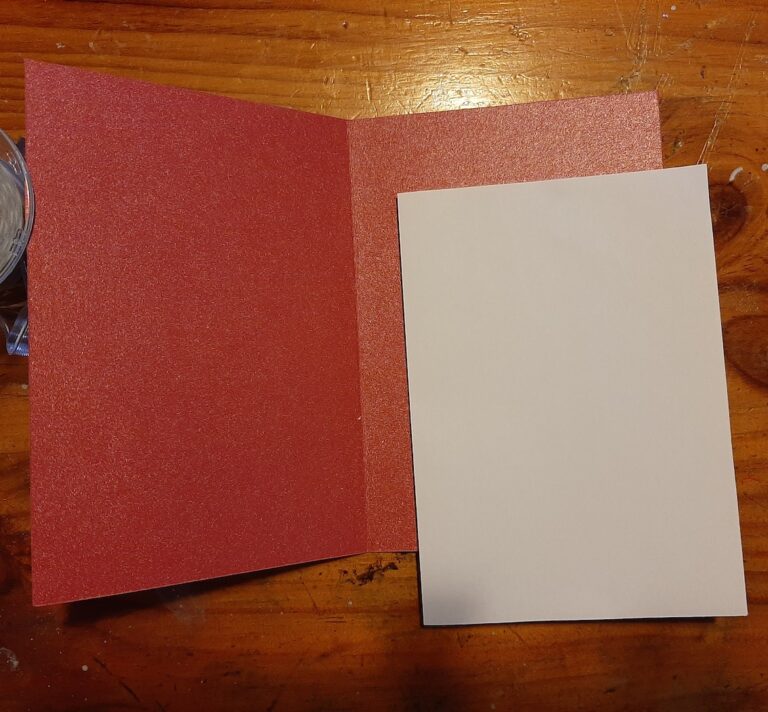
Too often my card insides are an afterthought. I’ve done the single square of white paper in the past but it feels too homemade for me. I wanted to do the thin / translucentish paper inserts you get in professional cards. But where to get the thin paper at a reasonable price?

Yep, 60 GSM paper in a kids’ blank scrapbook from the local discount store. Typical paper for a printer is 80GSM, so look for 40 to 60 GSM. Would I use this in scrapbooking? No, as I doubt it is archival quality. But for a Christmas Card? Certainly.

  1. Trim down the paper to about 10 mm (3/8″) smaller than the card, fold it in half, and put a nice crease down the fold.
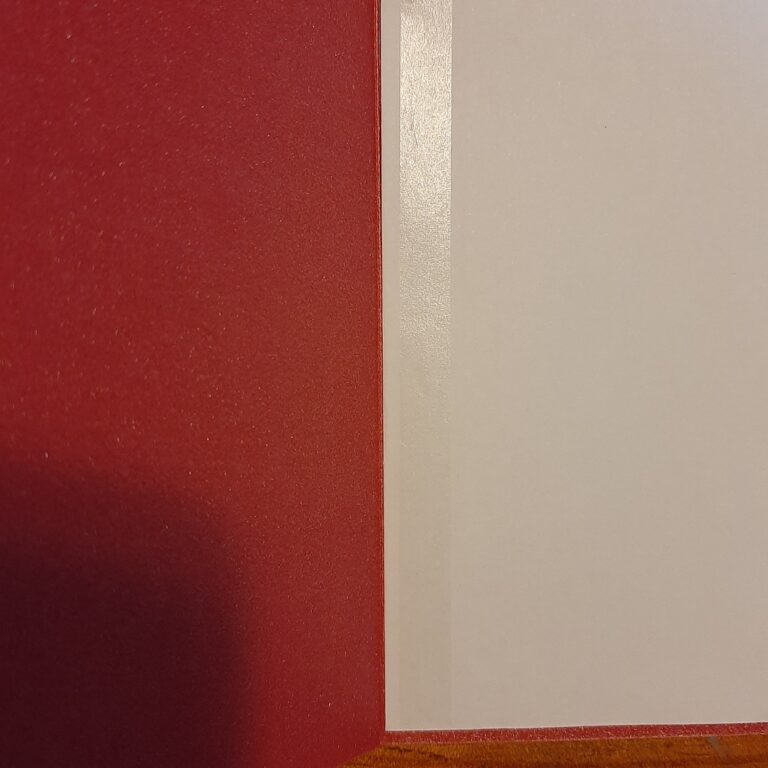
  2. Using your double-sided tape or glue put a thin strip of sticky next to the back fold of the card. I use a tape runner for this as it is quick and easy.
  3. Stick in the insert then put a matching strip of tape/glue on the insert paper.
  4. Carefully close the card so that the insert sticks close to the card fold and rub the card spine to stick it all nicely.
  5. Design feature: Depending on how you close the card, the insert sticks out a bit from the card fold. This helps the card to stay standing up nicely. Well, that’s my excuse and I’m sticking to it.

Ooopsy

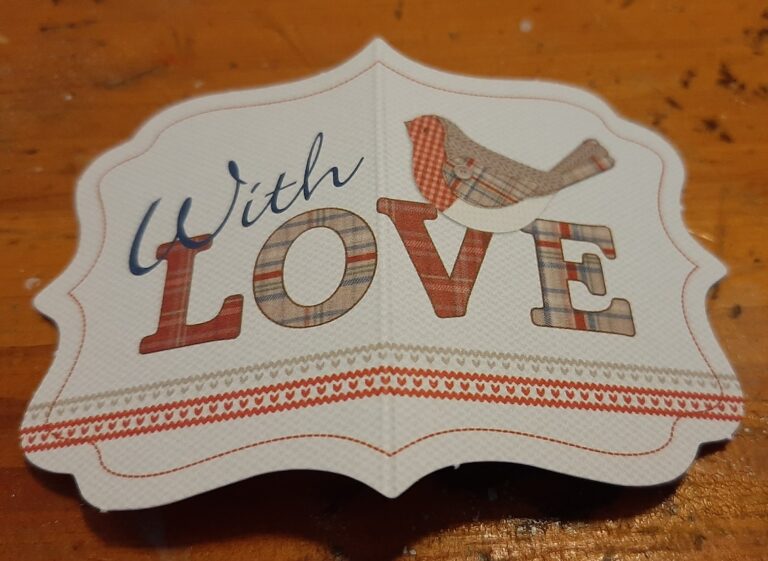
I tried putting the sticky strips on both sides of the insert fold and then putting it in the card. Only I put the sticky strips next to the open edges, not the fold and then stuck in the insert, with the open bit in the crease. I ended up with a triangular insert. So, washi tape to hold down the triangles flat, find an embellishment, crease it in the middle and stick it up the top. Voila! An insert with a difference.

Countdown to Christmas

Christmas comes every year but do I organize myself early? Or even on time?

So, what needs to be done between now and Christmas?

  • Make the present for my quilting groups’ Christmas Dinner swap. One patchwork trivet / pot holder / heat thingy is required.
  • Finish off my friends’ fabric challenge from last Christmas. Oh, and buy the fabric for this year’s fabric challenge swap. Should one really buy the next year’s fabric, when I haven’t finished this year’s? Why yes, of course!
  • Make a doona cover. The matching quilt will have to wait – no way that’s getting done before Christmas 2022.
  • Turn a panel I bought a month ago into a wall hanging.
  • Come up with 2 other gifts for immediate family.
  • Find some decent Christmas-themed tea towels and crochet the tops for presents and to sell. Since Covid the quality of the tea towels at my local shops has gone downhill, and the prices have gone up.
  • Come up with a whole pile of small gifts for friends. Normally I do tea towels. Hmmm. See previous comment.

So what have I got organized? Cards. Yes, I actually did it this year – I’ve made my Christmas cards before the Christmas rush. I’ve uncovered my sewing machine table from the piles of fabric so I can actually stitch. I’m going on a crafty day retreat to do resin and pottery this weekend. Surely something I make this weekend will be present quality.

And a list. I’ve made a list. So I’m halfway there if I have a list. Right?

But now it is time to cook dinner and work on the birthday present I need to finish for next week. Christmas can wait.